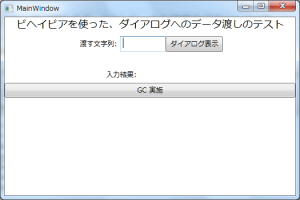
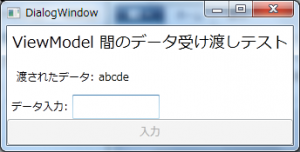
WPF のアプリケーション作成で MVVM パターンを採用したときに、カスタムダイアログボックスを表示する際にデータを渡したいとか、カスタムダイアログボックスでユーザーが入力したデータを受け取りたい場合、ビューとビューモデルの間の疎結合をどうやって保とうか?ということで、ビヘイビアを作ってみました(表示するダイアログ側のビューモデルが持つデータ受け取り用のプロパティの情報をインターフェイスで表すように変更しました(2013/02/26))。
(2014年1月23日追記)
ウィンドウの遷移や複数ウィンドウの表示を行うことができる TransitionViewModelBase の記事を投稿しました。
使い方は、次のようになります。
<i:Interaction.Triggers>
    <ei:PropertyChangedTrigger Binding="{Binding CommunicationDialog, Mode=OneWay}">
        <b:DialogTransferDataAction Parameter="{Binding CommunicationDialog, Mode=OneWay}"
                                  DialogType="{Binding DialogType, Mode=OneWay}"
                                  ActionCallBack="{Binding DialogActionCallback, Mode=OneWay}"
                                  ResultViewModel="{Binding ResultViewModel, Mode=OneWayToSource}"/>
    </ei:PropertyChangedTrigger>
</i:Interaction.Triggers>
PropertyChangedTrigger で監視しているビューモデルのプロパティチェンジ・イベントが発生した時にカスタムダイアログボックスが表示されます。
DialogTransferDataAction のプロパティの説明は次のとおりです。
- Parameter
- 表示するカスタムダイアログボックスのビューモデルへ渡すデータ
渡す情報がない場合には CommunicationEmpty のインスタンスを生成してセットする - DialogType
- 表示するカスタムダイアログボックスの型の情報(Type オブジェクト)
- ActionCallBack
- ダイアログが閉じられた後に実行するするコールバックメソッド
- ResultViewModel
- 作成したウィンドウのビューモデルオブジェクトがセットされる(ダイアログ側で設定したデータの受け渡し用)
ビヘイビアの作成ということで、Expression Blend SDK(有料のExpression Blend とは別もの) が必要です。入れていない方は、かずきさんのブログ記事が詳しいので、ご覧ください。
プロジェクトの名前は DialogTransferDataBehaviorTest としました。
まず最初に DLL への参照設定です。「参照設定」を右クリックして「参照の追加」を選択し、次の2つの DLL への参照を設定します。
- System.Windows.Interactivity.dll
- Microsoft.Expression.Interactions.dll
ビヘイビアの作成です。Behaviors フォルダを作ります。
まず、Behaviors フォルダに、IDialogTransferContainer インターフェイスを作ります。
namespace DialogTransferDataBehaviorTest.Behaviors
{
    /// <summary>
    /// 生成元ウィンドウからのデータの受取用プロパティを持つインターフェイスです。
    /// </summary>
    interface IDialogTransferContainer
    {
        object Container { get; set; }
    }
}
次に Behaviors フォルダに、CommunicationEmpty クラスを作ります。このクラスは表示するダイアログに渡す情報がない場合にインスタンスを生成してセットするためのものです(string.Empty などをセットすると、PropertyChanged は最初の一回しか発火しない)。
namespace DialogTransferDataBehaviorTest.Behaviors
{
    /// <summary>
    /// ダイアログへ通知するメッセージが無い場合にセットする通知メッセージ
    /// </summary>
    class CommunicationEmpty
    {
        public CommunicationEmpty() { }
    }
}
次に Behaviors フォルダに、DialogTransferDataAction クラスを作ります。
データ受け渡し用の Parameter プロパティが null または CommunicationEmpty のインスタンスで無いときには IDialogTransferContainer の Container プロパティに Parameter で渡されたオブジェクトをセットするようにしています。
using System;
using System.Windows;
using System.Windows.Interactivity;

namespace DialogTransferDataBehaviorTest.Behaviors
{
    /// <summary>
    /// データを渡してダイアログウィンドウを表示するアクション
    /// ダイアログ側のビューモデルにデータ受取り用の「public object Container」プロパティが必要
    /// </summary>
    class DialogTransferDataAction : TriggerAction<FrameworkElement>
    {
        // ViewModel 側のデータ受取り用のプロパティ名
        private const string _containerName = "Container";
        // ViewModel 名として View の名前に付加される文字列
        private const string _viewModelAppendString = "ViewModel";

        /// <summary>
        /// ダイアログウィンドウに渡すデータを格納
        /// </summary>
        public static readonly DependencyProperty ParameterProperty = DependencyProperty.Register(
            "Parameter", typeof(object), typeof(DialogTransferDataAction),
            new UIPropertyMetadata()
            );

        public object Parameter
        {
            get { return (object)GetValue(ParameterProperty); }
            set { SetValue(ParameterProperty, value); }
        }

        /// <summary>
        /// 表示するダイアログのクラス名
        /// </summary>
        public static readonly DependencyProperty DialogTypeProperty = DependencyProperty.Register(
            "DialogType", typeof(Type), typeof(DialogTransferDataAction),
            new UIPropertyMetadata()
            );

        public Type DialogType
        {
            get { return (Type)GetValue(DialogTypeProperty); }
            set { SetValue(DialogTypeProperty, value); }
        }

        /// <summary>
        /// ダイアログでの選択結果をViewModelに通知するコールバックメソッド
        /// </summary>
        public static readonly DependencyProperty ActionCallBackProperty = DependencyProperty.Register(
            "ActionCallBack", typeof(Action<object>), typeof(DialogTransferDataAction),
            new UIPropertyMetadata()
            );

        public Action<object> ActionCallBack
        {
            get { return (Action<object>)GetValue(ActionCallBackProperty); }
            set { SetValue(ActionCallBackProperty, value); }
        }

        /// <summary>
        /// 作成したウィンドウのビューモデルオブジェクトを呼び出したウィンドウのビューモデルに渡します。
        /// ダイアログ側で設定したデータの受け渡し用
        /// </summary>
        public static readonly DependencyProperty ResultViewModelProperty = DependencyProperty.Register(
            "ResultViewModel", typeof(object), typeof(DialogTransferDataAction),
            new UIPropertyMetadata()
            );

        public object ResultViewModel
        {
            get { return GetValue(ResultViewModelProperty); }
            set { SetValue(ResultViewModelProperty, value); }
        }

        protected override void Invoke(object parameter)
        {
            // ダイアログの型からダイアログのインスタンスを作成
            if (DialogType == null)
            {
                var message = "DialogType が null のため、ダイアログを生成できません。";
                throw new InvalidOperationException(message);
            }
            var window = Activator.CreateInstance(DialogType);
            if ((window as Window) == null)
            {
                var message = string.Format("表示するように指定された {0} は Window の派生クラスではありません。",
                    DialogType.Name);
                throw new InvalidOperationException(message);
            }
            ResultViewModel = (window as Window).DataContext;   // ビューモデルをプロパティへセット
            // Parameter がある場合には ViewModel の Container へデータをセットする
            if (Parameter != null && (Parameter as CommunicationEmpty) == null)
            {
                var recievedViewModel = ResultViewModel as IDialogTransferContainer;
                if (recievedViewModel == null)
                {
                    var message =
                        string.Format("{0} のビューモデルが IDialogTransferContainer インターフェイスを実装していません。",
                        DialogType.Name);
                    throw new InvalidCastException(message);
                }

                recievedViewModel.Container = Parameter;
            }

            // ダイアログを表示する
            if (ActionCallBack != null)
            {
                ActionCallBack(DialogType.InvokeMember("ShowDialog", System.Reflection.BindingFlags.InvokeMethod,
                    null, window, null));
            }
            else
            {
                DialogType.InvokeMember("ShowDialog", System.Reflection.BindingFlags.InvokeMethod,
                    null, window, null);
            }

            ResultViewModel = null;    // 作成された ViewModel オブジェクトへの参照をクリアしておく。
        }
    }
}
次に、カスタムダイアログボックスに渡すデータのクラスを作ります。置き場所は Models フォルダにしました(ここらへんはいろいろ考え方があるかと思います)。
Models フォルダを作成します。
Models フォルダに Main2DialogContainer クラスを作成します。
namespace DialogTransferDataBehaviorTest.Models
{
    class Main2DialogContainer
    {
        public string Message { get; set; }
    }
}
次にビューモデルです。ViewModels フォルダを作ります。
MVVM パターンなので、お決まりのコマンド処理とプロパティチェンジイベントの発火を提供する ViewModelBase クラスは別記事の ViewModelBase で書いたものを使っています。別プロジェクトにして作成した DLL を参照設定で追加するなり、プロジェクト内にソースを取り入れるなりしてください。
ViewModel フォルダに MainWindowViewModel クラスを作ります。
コード中に、オブジェクトの生成と破棄の確認用のメッセージ出力を入れています。確認用のメッセージは IDE の出力タブのウィンドウに表示されます。
using System;
using System.Windows.Input;

using MakCraft.ViewModels;

using DialogPassedDataBehavior.Models;

namespace DialogTransferDataBehaviorTest.ViewModels
{
    class MainWindowViewModel : ViewModelBase
    {
        private string _dialogName;
        private Action<object> _dialogActionCallback;
        private string _message;
        private string _result;

        public MainWindowViewModel()
        {
            System.Diagnostics.Trace.WriteLine("Create MainWindowViewModel...");

            DialogType = typeof(DialogWindow);
        }

        /// <summary>
        /// Dialog に渡すデータ
        /// </summary>
        public object CommunicationDialog { get; private set; }

        /// <summary>
        /// 表示するカスタムダイアログボックスの型の情報
        /// </summary>
        public Type DialogType
        {
            get { return _dialogType; }
            private set
            {
                _dialogType = value;
                base.RaisePropertyChanged(() => DialogType);
            }
        }

        /// <summary>
        /// ダイアログが閉じられた後に実行するコールバック
        /// </summary>
        public Action<object> DialogActionCallback
        {
            get { return _dialogActionCallback; }
            private set
            {
                _dialogActionCallback = value;
                base.RaisePropertyChanged(() => DialogActionCallback);
            }
        }

        /// <summary>
        /// ダイアログ表示で生成されたダイアログのビューモデルを受け取る
        /// (ダイアログで設定された値の受け取り用)
        /// </summary>
        public object ResultViewModel { get; set; }

        /// <summary>
        /// 入力されたデータの受取用プロパティ
        /// </summary>
        public string Message
        {
            get { return _message; }
            set
            {
                _message = value;
                base.RaisePropertyChanged(() => Message);
            }
        }

        /// <summary>
        /// カスタムダイアログボックスで入力されたデータの表示用プロパティ
        /// </summary>
        public string Result
        {
            get { return _result; }
            set
            {
                _result = value;
                base.RaisePropertyChanged(() => Result);
            }
        }

        private void showDialogCommandExecute()
        {
            // 注意事項 string.Empty などをセットすると、PropertyChanged は最初の一回しか発火しない。
            // 渡す情報がない場合には CommunicationEmpty のインスタンスを生成してセットする。
            CommunicationDialog = new Main2DialogContainer { Message = this.Message };
            DialogActionCallback = dialogResult =>
            {
                if ((bool)dialogResult == true)
                {
                    var viewModel = (ResultViewModel as DialogWindowViewModel);
                    Result = viewModel.InputText;
                }
            };
            // View 側のトリガーをキックしてダイアログウィンドウを表示させる
            base.RaisePropertyChanged(() => CommunicationDialog);
            Message = "";
        }
        private ICommand showDialogCommand;
        public ICommand ShowDialogCommand
        {
            get
            {
                if (showDialogCommand == null)
                    showDialogCommand = new RelayCommand(
                        param => showDialogCommandExecute()
                        );
                return showDialogCommand;
            }
        }

        private void gcCommandExecute()
        {
            GC.Collect();
            GC.WaitForPendingFinalizers();
            GC.Collect();
        }
        private ICommand gcCommand;
        public ICommand GcCommand
        {
            get
            {
                if (gcCommand == null)
                    gcCommand = new RelayCommand(
                        param => gcCommandExecute()
                        );
                return gcCommand;
            }
        }

        ~MainWindowViewModel()
        {
            System.Diagnostics.Trace.WriteLine("Dispose MainWindowViewModel...");
        }
    }
}
次に ViewModels フォルダに DialogWindowViewModel クラスを作ります。
こちらもコード中に、オブジェクトの生成と破棄の確認用のメッセージ出力を入れています。
ビューのクローズはビュー側で実装しています。
using MakCraft.ViewModels;

using DialogPassedDataBehavior.Behaviors;
using DialogPassedDataBehavior.Models;

namespace DialogTransferDataBehaviorTest.ViewModels
{
    class DialogWindowViewModel : ViewModelBase, IDialogTransferContainer
    {
        public DialogWindowViewModel()
        {
            System.Diagnostics.Trace.WriteLine("Created DialogWindowViewModel...");
        }

        #region IDialogTransferContainer

        private object _container;
        /// <summary>
        /// MainWindow からのデータの受取用プロパティ
        /// </summary>
        public object Container
        {
            get { return _container; }
            set
            {
                _container = value;
                var container = _container as Main2DialogContainer;
                if (container != null)
                {
                    RecieveText = container.Message;
                }
            }
        }

        #endregion IDialogTransferContainer

        private string _recieveText;
        /// <summary>
        /// 受け取ったデータの表示用プロパティ
        /// </summary>
        public string RecieveText
        {
            get { return _recieveText; }
            set
            {
                _recieveText = value;
                base.RaisePropertyChanged(() => RecieveText);
            }
        }

        private string _inputText;
        /// <summary>
        /// 入力されたデータの受取用プロパティ
        /// </summary>
        public string InputText
        {
            get { return _inputText; }
            set
            {
                _inputText = value;
                base.RaisePropertyChanged(() => InputText);
                base.RaisePropertyChanged(() => IsEnableButton);
            }
        }

        /// <summary>
        /// 入力ボタンの有効化可否判断用プロパティ
        /// </summary>
        public bool IsEnableButton
        {
            get { return (!string.IsNullOrEmpty(InputText)); }
        }

        ~DialogWindowViewModel()
        {
            System.Diagnostics.Trace.WriteLine("Dispose DialogWindowViewModel...");
        }

    }
}
次にビューです。
MainWindow.xaml を次のように変更します。
<Window x:Class="DialogTransferDataBehaviorTest.MainWindow"
        xmlns="http://schemas.microsoft.com/winfx/2006/xaml/presentation"
        xmlns:x="http://schemas.microsoft.com/winfx/2006/xaml"
        xmlns:i="http://schemas.microsoft.com/expression/2010/interactivity"
        xmlns:ei="http://schemas.microsoft.com/expression/2010/interactions"
        xmlns:b="clr-namespace:DialogTransferDataBehaviorTest.Behaviors"
        xmlns:vm="clr-namespace:DialogTransferDataBehaviorTest.ViewModels"
        Title="MainWindow" Height="350" Width="525">
    <Window.DataContext>
        <vm:MainWindowViewModel />
    </Window.DataContext>
    <i:Interaction.Triggers>
        <ei:PropertyChangedTrigger Binding="{Binding CommunicationDialog, Mode=OneWay}">
            <b:DialogTransferDataAction Parameter="{Binding CommunicationDialog, Mode=OneWay}"
                                      DialogType="{Binding DialogType, Mode=OneWay}"
                                      ActionCallBack="{Binding DialogActionCallback, Mode=OneWay}"
                                      ResultViewModel="{Binding ResultViewModel, Mode=OneWayToSource}"/>
        </ei:PropertyChangedTrigger>
    </i:Interaction.Triggers>
    <StackPanel>
        <TextBlock Text="ビヘイビアを使った、ダイアログへのデータ渡しのテスト" FontSize="18" HorizontalAlignment="Center" />
        <StackPanel Margin="6">
            <StackPanel Orientation="Horizontal" HorizontalAlignment="Center">
                <Label Content="渡す文字列:" />
                <TextBox Text="{Binding Message}" MinWidth="80" />
                <Button Content="ダイアログ表示" Command="{Binding ShowDialogCommand}" Padding="6 2" />
            </StackPanel>
        </StackPanel>
        <StackPanel Orientation="Horizontal" HorizontalAlignment="Center" Margin="0 20 0 0">
            <Label Content="入力結果:" />
            <TextBlock Text="{Binding Result}" VerticalAlignment="Center" MinWidth="100" />
        </StackPanel>
        <Button Content="GC 実施" Command="{Binding GcCommand}" Padding="6 2" />
    </StackPanel>
</Window>
次に MainWindow.xaml と同じ階層に DialogWindow.xaml を作成します。
入力ボタンの設定で、ボタンクリックをトリガーとして、Blend SDK 組み込みの ChangePropertyAction で DialogResult プロパティにTrue をセットすることによりウィンドウを閉じています。
<Window x:Class="DialogTransferDataBehaviorTest.DialogWindow"
        xmlns="http://schemas.microsoft.com/winfx/2006/xaml/presentation"
        xmlns:x="http://schemas.microsoft.com/winfx/2006/xaml"
        xmlns:i="http://schemas.microsoft.com/expression/2010/interactivity"
        xmlns:ei="http://schemas.microsoft.com/expression/2010/interactions"
        xmlns:vm="clr-namespace:DialogTransferDataBehaviorTest.ViewModels"
        x:Name="Window" Title="DialogWindow" SizeToContent="WidthAndHeight">
    <Window.DataContext>
        <vm:DialogWindowViewModel />
    </Window.DataContext>
    <StackPanel>
        <TextBlock Text="ViewModel 間のデータ受け渡しテスト" FontSize="18"
                   Margin="6" HorizontalAlignment="Center" />
        <StackPanel Orientation="Horizontal" Margin="6">
            <Label Content="渡されたデータ:" />
            <TextBlock Text="{Binding RecieveText}" VerticalAlignment="Center" />
        </StackPanel>
        <StackPanel>
            <StackPanel Orientation="Horizontal">
                <Label Content="データ入力:" />
                <TextBox MinWidth="100" Text="{Binding InputText, UpdateSourceTrigger=PropertyChanged}" />
            </StackPanel>
            <Button Content="入力" IsEnabled="{Binding IsEnableButton}" IsDefault="True" Padding="10 4">
                <i:Interaction.Triggers>
                    <i:EventTrigger EventName="Click">
                        <ei:ChangePropertyAction TargetObject="{Binding ElementName=Window}"
                                                 PropertyName="DialogResult" Value="True" />
                    </i:EventTrigger>
                </i:Interaction.Triggers>
            </Button>
        </StackPanel>
    </StackPanel>
</Window>
以上で完成です。動かすと次のようになります。


MainWindow で入力したテキストが DialogWindow に表示され、DialogWindow で入力したテキストが MainWindow に表示されます。
最後に、このビヘイビアの作成にあたり、trapemiya さんのブログ記事[WPF] MVVMでViewModelからViewを操作する(Blend付属アセンブリ使用版)が大変参考になりました。この場を借りてお礼申し上げます。